
Why the first floor check matters
The brooding floor sets the tone for chick health, feed intake and early growth. A dry, level, clean floor helps chicks find heat, water and feed quickly, while a patchy floor creates cold spots, piling and uneven starts. In South Africa, that matters even more when daytime heat and night-time cold swing hard, or when load-shedding throws off your heating plan.
Before chicks arrive, walk the house as if you were a chick. Check for damp corners, damaged mesh, sharp edges, loose wire, and anything that can trap litter or cut feet. The aim is simple: chicks must land in a warm, dry space with no delays. If your house is in places like Delmas, Standerton, Newcastle or Rustenburg, you also need to watch dust, wind and winter chill because they all affect how the floor holds temperature.
A good brooding start is not only about the heater and feeders. It begins with the floor itself, because that is where the birds spend most of their first days.
Litter depth, dryness and what to avoid
Fresh litter must be dry right through, not just on top. Wet material from a damp store room or a leaking roof will raise moisture under the chicks and create a smell before the first week is over. Aim for an even litter bed of about 5 to 10 cm, depending on house type and flooring. Too little litter leaves birds exposed, while too much can hide wet patches and make floor heat harder to manage.
Wood shavings, chopped straw and similar materials can work well if they are clean and dry. Avoid anything mouldy, dusty to the point of caking, or with foreign pieces such as plastic, string or wire. In coastal humidity, especially if a site has been shut for a while, litter can pull moisture from the air very quickly, so store it under cover and off the ground. One wet bale in the middle of the house can spread trouble fast.
- Check litter moisture by squeezing a handful. It should fall apart, not form a wet ball.
- Spread litter evenly to all corners, including under side walls and around stanchions.
- Replace any wet patches near drinker lines, doors or leak points before chicks arrive.
- Keep spare dry litter on site for quick top-ups during the first week.
If litter is cool to the touch in the morning, the house is probably not holding temperature well enough yet. That is a small warning, but it often points to bigger heating or draught issues.
Paper placement that gets chicks eating early
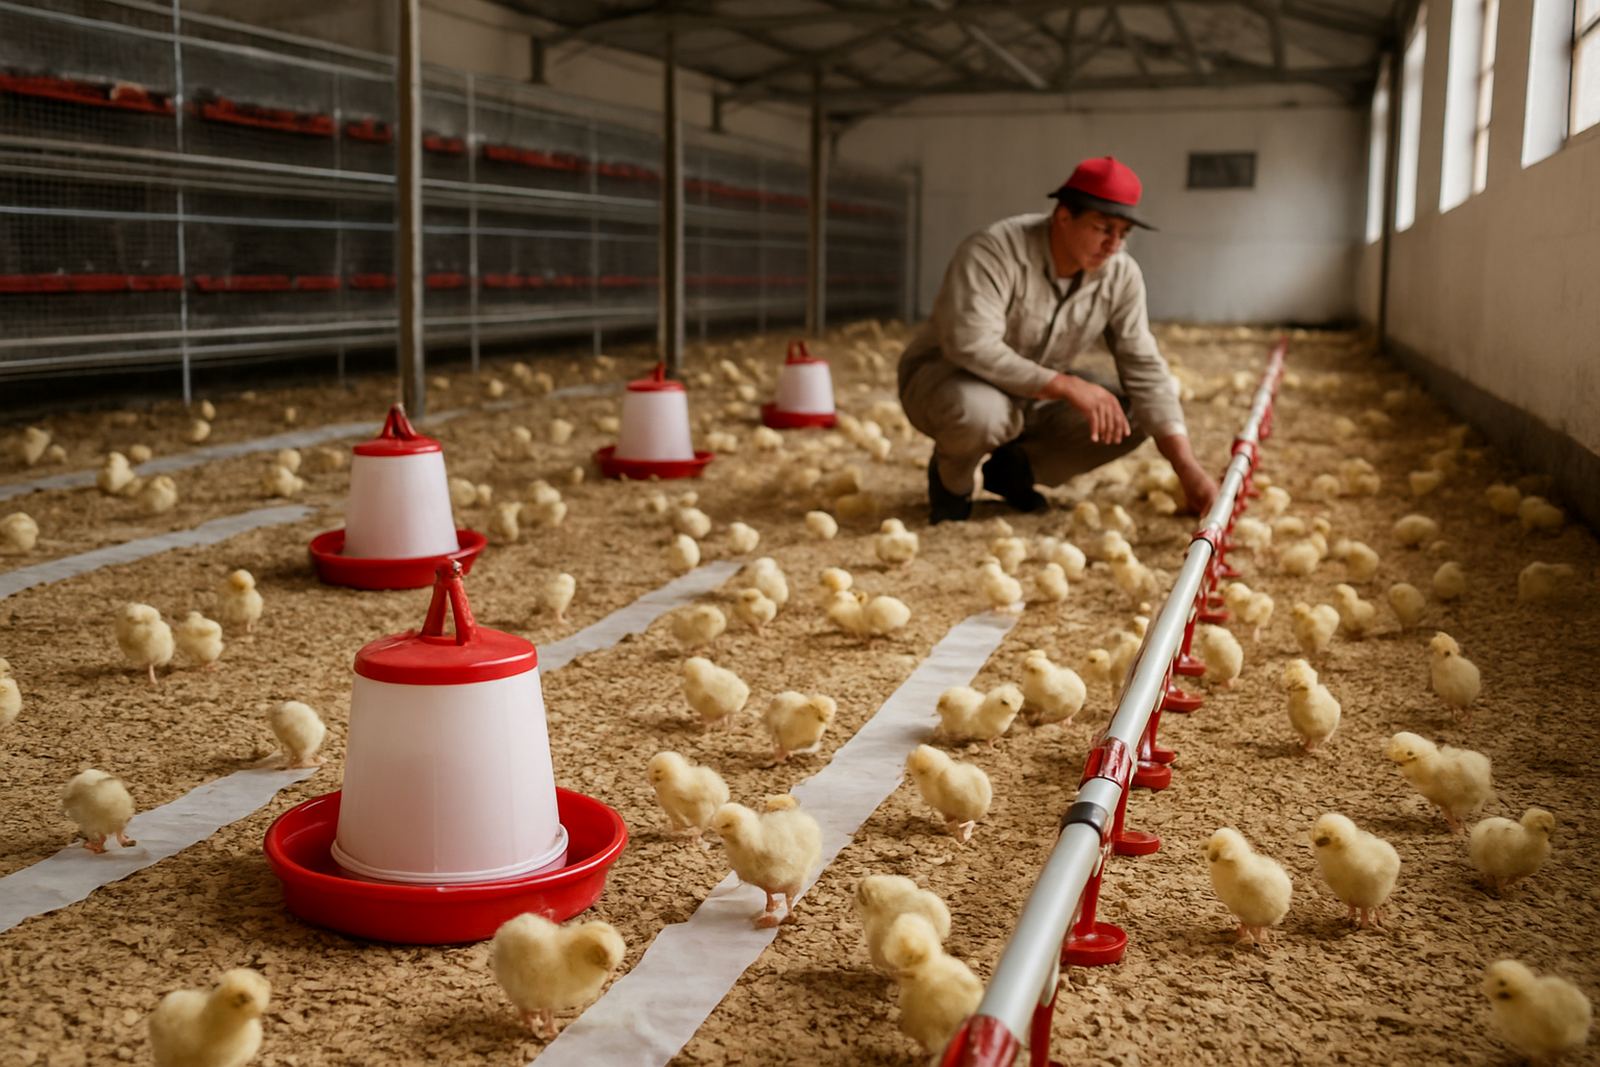
Paper is not there for looks. It helps chicks find feed fast, and the layout should support movement from the start. Use clean, dry paper or starter sheets across the brooding area, with no gaps that let chicks slip through or bunch up. The surface must stay flat enough to carry feed, but not so slick that birds lose footing.
Place feed on the paper in small, even lines or patches, then keep checking that chicks are actually eating and not just standing around the edges. In the first 24 hours, the main job is to get feed intake up and water access steady. If the paper tears, curls or lifts in the draught, secure it properly or replace it. A few loose pieces can move under chicks and create panic, which spreads quicker than most people expect.
- Lay paper only where the brooding area is active, not where it will get wet from drinkers.
- Overlap joints so chicks do not fall into gaps.
- Keep feed lines short and accessible so weaker chicks are not pushed away.
- Remove soggy or soiled paper early, before it breaks up and sticks to litter.
Do not overfill the paper. Too much feed can be wasted, and too little leaves chicks searching. The aim is steady access, not a full floor of feed.
Heaters, drinkers and feeders must be in the right place
Floor prep is also equipment prep. If the heaters, drinkers and feeders are not set to the right height and spacing, chicks spend energy walking instead of feeding. Before placement, check that each item is clean, working and positioned for even access across the house. In a long house, especially, a poor layout can leave one end too busy and the other end underused.
Water lines must be flushed and tested for leaks. Feeders should sit low enough for small chicks to reach, but not so low that litter gets kicked in. Drinkers must not drip, because one leak can ruin a brooding patch in a few hours. If you are relying on standby power during load-shedding, test the full setup before chick day, not after. A generator that starts late can undo a week of planning.
Keep a simple pre-placement check near the house entrance:
- Heaters fired and holding the correct temperature
- Drinkers flushed, clean and drip-free
- Feeders filled and easy to reach
- Thermometers and backup probes working
- Lights on, with no dark corners
If you have to climb over equipment to inspect it, the layout probably needs another look. Chicks need space to move, but they also need clear routes to feed and water.
A realistic brooding plan for South African conditions
Weather changes the plan. A brooding house in Middelburg in July does not behave like a house near Empangeni in summer. Cold mornings, coastal humidity, high dust levels and power interruptions all affect how litter holds heat and how quickly the floor dries after cleaning. For that reason, your brooding floor prep should always match the season and the district.
For example, on a poultry project near Bronkhorstspruit, one grower used dry shavings but still struggled with chilled chicks at the edges of the house. The problem was not the litter alone. The side curtains were letting in a draught, and one drinker line was leaking near the back wall. Once the leak was fixed, the wet patch dried out and the brooding ring held temperature much better. It was a small repair, but it changed the flock start.
That is why site-specific thinking matters. A floor that looks clean can still fail if the house is losing heat, the doors are leaking air, or the floor slope is sending moisture to one end. Good preparation means checking the whole picture, not just the visible surface.
Final checks before chicks arrive
The last round of preparation should be calm and methodical. Once the litter, paper and equipment are in place, do one slow walk-through and look for anything that could slow chick movement or cool the floor. This is the time to fix small faults, because after placement every hour counts. Keep spare bulbs, tools, tape, extra paper and dry litter close by so you are not running around the yard during placement.
Use this final checklist:
- Floor is dry, even and free of sharp debris
- Litter depth is consistent from wall to wall
- Paper is secure and dry
- Feeders and drinkers are ready at chick height
- Heat is stable across the brooding area
- Backup power and fuel are ready if needed
When the chicks arrive, the brooding floor should not need attention beyond fine-tuning. If you have prepared properly, the birds should settle quickly, find feed and water, and begin to spread evenly across the house. That first day says a lot about the next few weeks, so get the floor right before the crate doors open.