
Arrive With the House Ready, Not Just Warm
Before the chicks arrive, the house must be clean, dry and properly pre heated. In most South African conditions that means checking the floor temperature, not only the air temperature, because cold concrete pulls heat out of day old birds very quickly. If you are in a coastal area or a humid summer spell, allow extra drying time after washing and disinfection, since damp litter starts to cake long before you see it from the doorway.
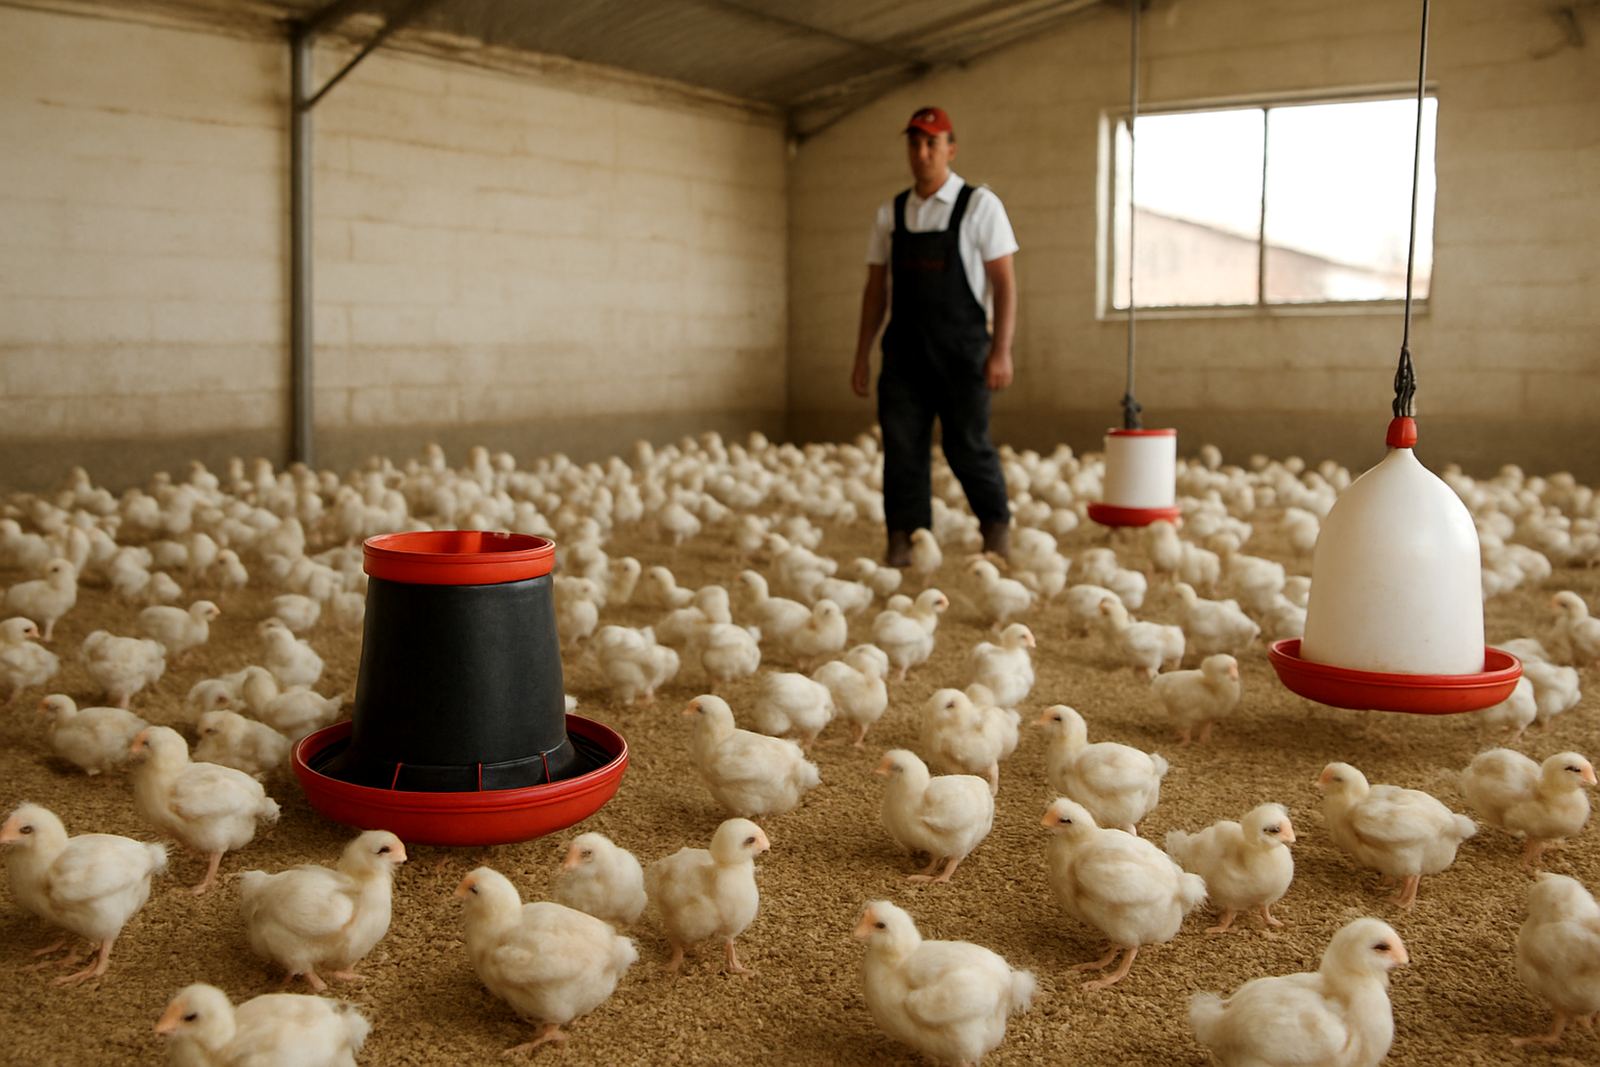
Set up chick guards, drinkers, feeders and brooder heat at least the day before placement. The goal is simple: the birds must find water and feed within a few steps of where they are released. If the brooder coverage is too small, chicks drift into cold corners. If it is too big, they spread out, lose body heat and sit too far from the feed line. Both mistakes cost you feed intake in the first 24 hours.
- Check house temperature, litter dryness and ventilation before the truck arrives.
- Make sure all equipment is working, including backup power for load-shedding.
- Lay feed on trays or paper in the brooder area for immediate access.
- Confirm that drinkers are full, clean and set at the right height.
Brooder Coverage Must Match Chick Behaviour
A good brooder area keeps chicks close enough to heat, water and feed without crowding them into a tight ring. Watch how they settle in the first 30 minutes. Chicks that cluster hard under the heat source are cold, while chicks that move to the edges and pant are too hot. Even distribution tells you the brooder footprint is close to right. This is where small adjustments matter more than clever ideas.
Use the first night as your main check point. Move quietly through the house and look at chick position, sound level and activity. If they are spread evenly and peeping softly, conditions are usually fine. If they pile up, keep shifting away from the centre or drifting to the walls, fix the temperature or draughts before morning. A weak first night can show up later as poor uniformity and slower compensaton after stress.
- Start with a smaller covered area and expand only when the birds are active and even.
- Block direct draughts at doors, corners and side inlets.
- Keep heat source height and output matched to the house size.
- Check bird spread at least every 2 to 3 hours during the first 24 hours.
Water Comes First, Then Feed
Chicks need water before they need much else. If the drinker line is too high, too low or not enough units are available, the first feed means very little. In the first week, a chick that drinks well will usually find feed more quickly and stay active longer. Clean water matters too, especially where borehole water has mineral build up or municipal water carries chlorine that changes through the day.
Place drinkers so the chicks can reach them without pushing through a crowd. Fill and test every point before placement. If you are using nipple lines, check pressure and drip response, because a dry line wastes valuable time. With open drinkers, keep the water level consistent and remove bedding that gets splashed through. Wet litter around drinkers is one of the fastest ways to create poor footing and chilled birds.
- Offer water immediately on placement and confirm chicks drink within the first hour.
- Check height daily as birds grow, especially in the first 7 days.
- Flush lines and check for blockages if water flow drops.
- Keep spare drinker parts on site for fast replacement.
Feed Access Must Be Easy and Constant
Broiler chicks should not have to search for feed. In the first week, feed access is about more than just putting feed in the house. It is about presentation, distribution and repeat checks. When feed is laid out in a thin even layer, chicks can start sooner and stronger. If feed is piled up in a few spots, the stronger birds take over and weaker ones fall behind.
Top up feed often rather than waiting for trays to empty. The aim is to keep the feed visible and within easy reach through the day and night. Watch for empty edges, spill loss and feed caking from humidity. In warm weather, stale feed around the brooder can go dusty fast, and dust affects intake. In cooler weather, feed that is too close to cold floor zones may stay untouched.
- Use enough feeder space for the number of chicks placed.
- Keep feed level low enough for easy access, but not wasted over the rim.
- Check for caked feed, especially near drinkers and house edges.
- Remove spilled feed daily so it does not attract moisture and pests.
Watch the First Seven Days Like a Routine, Not a Guess
The first week should follow a simple daily pattern. Check temperature, bird spread, water use, feed use and litter condition at set times. That gives you a proper picture instead of a guess based on one quick walk through the house. If birds are active early, settle well after feeding, and remain uniform in size, you are usually on track.
Pay attention to body feel when handling a sample of chicks. A chilled bird feels tight and quiet. An overheated bird feels loose and restless. A well managed chick is alert, warm and quick to stand. Keep notes on any house section that lags behind the rest, because the problem is often localised to one corner, one line of drinkers or one area with poor air movement. That is where the fix must start.
- Record temperature and bird behaviour at least morning, mid day and evening.
- Compare feed and water use from one day to the next.
- Check any dead or weak birds promptly and remove them from the house.
- Correct small problems the same day, do not wait for the next round.
Common First-Week Problems and What Usually Causes Them
When broilers struggle in the first week, the cause is often practical rather than mysterious. Cold floors, draughts, poor brooder coverage, limited drinker access and uneven feed spread are the usual culprits. If you fix those early, most houses recover well. If you leave them, the flock starts uneven and stays uneven, which affects growth later on.
In hot inland areas, the issue can be over heating during the day and cooling too quickly at night. On the Highveld, that daily swing can be sharp. Near the coast, the problem can be damp litter and slow drying after cleaning. Adjusting ventilation, heat and stocking sense in the first week prevents many of these setbacks. Keep your team aligned on the same routine so nobody changes settings without checking the whole house.
- Uneven birds: check heat distribution and draughts first.
- Poor appetite: check water access and feeder placement.
- Wet litter: check drinker height, leaks and ventilation.
- Quiet, huddled chicks: check floor temperature and brooder output.